
Trash into Treasure
Turning Trash into Treasure….A DIY Project
Nine out of ten times I write this blog in a very technical way or as an announcement regarding a product, events and upcoming news.
This month’s blog is all about taking trash and making it a treasure…A DIY project I decided to take on personally.
When you think of summer you think of BBQ’s, patios and appreciating the beautiful weather while it lasts. Not to mention enjoying lazy summer days hanging out with family and friends by the pool and on the deck.
Nothing is more rewarding than enjoying the great outdoors on beautiful, comfortable and budget friendly furniture created by you!!!
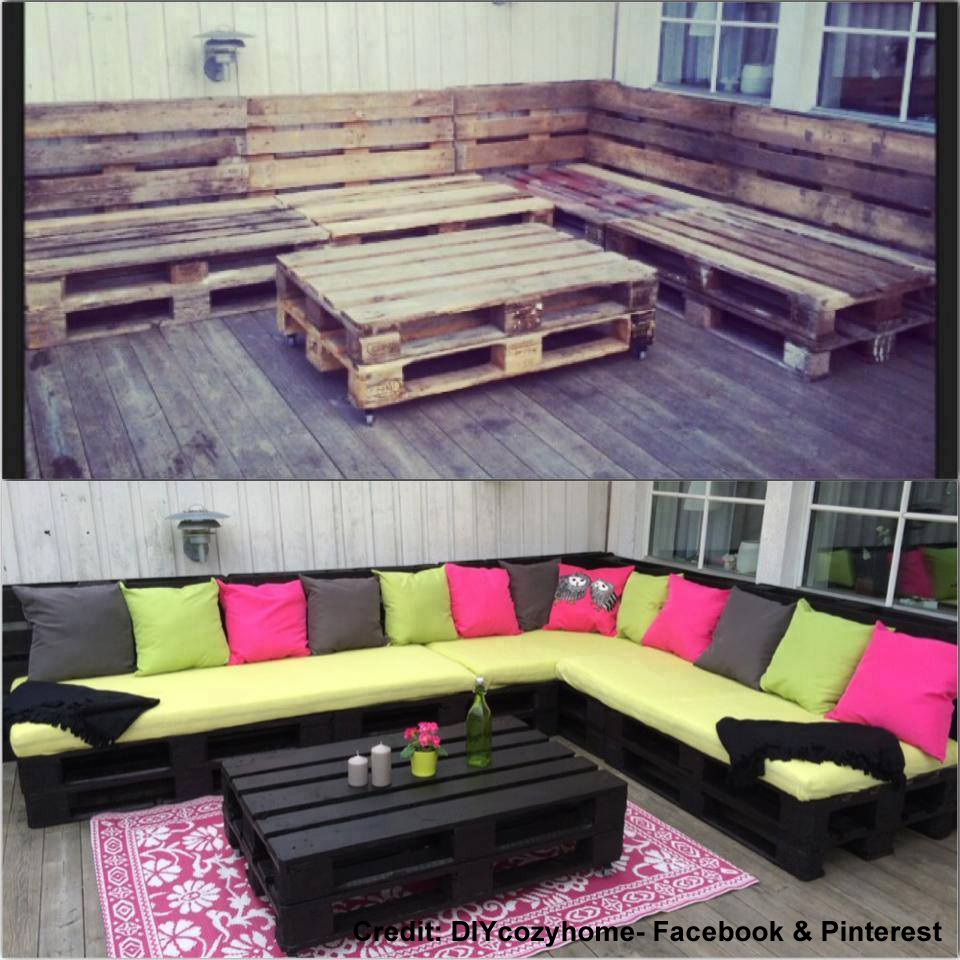
I first saw this idea posted on Facebook then again on Pinterest and decided to put the idea to the test using a Fuji Spray Q4™ system.
Keep in mind you can use any of the great quality FUJI spray systems to recreate this project.
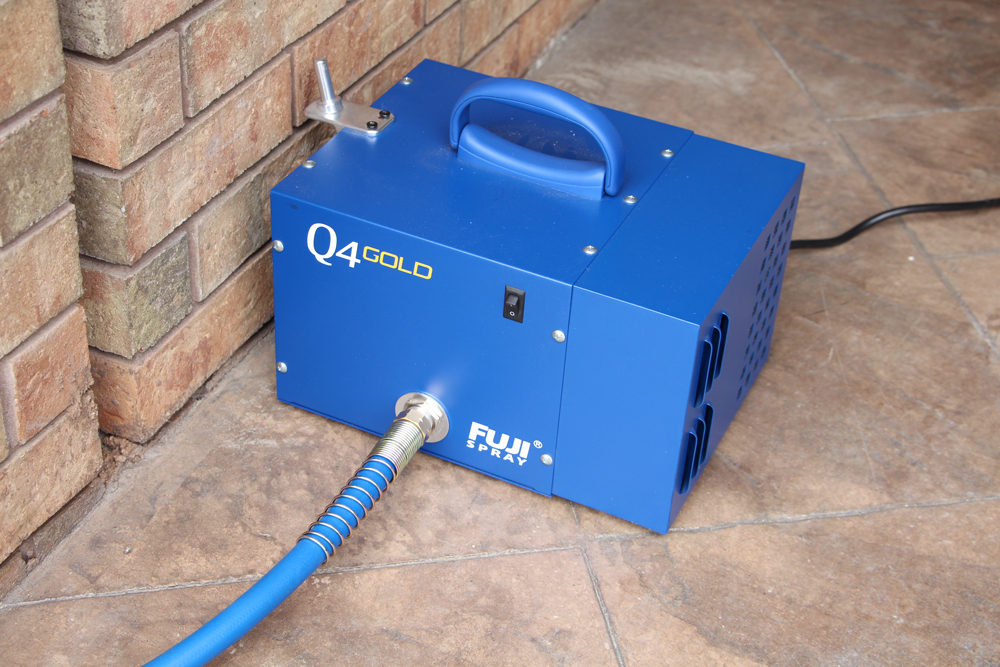
We chose to use the Q4™ for its powerful 4 stage HVLP Turbine that develops approximately 9psi, allowing for less thinning of paints. Not to mention getting the job done in a quiet environment (residential area) at a quicker pace.
What you will need:
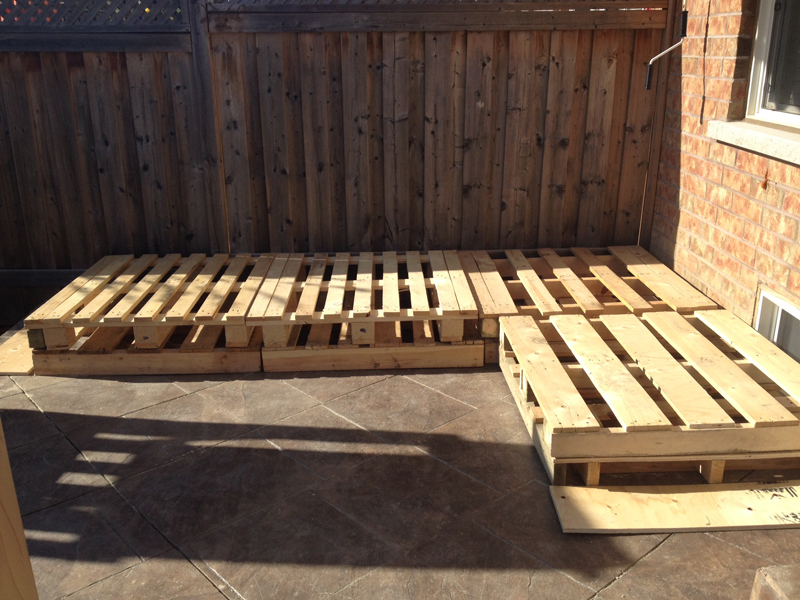
- Skids (We approximately used 14 skids)
- Fuji Spray HVLP System (only the best for a great project)
- Good Quality Paint for resurfacing wood (I used Behr Deck Over for this project)
- Wood Screws
- Drill
- Sand paper
- Tape Measure
- Level
- Extra pieces of wood…2×4’s, plywood, etc.
Simple DIY instructions…
This project is pretty straight forward and an easy weekend project for anyone wanting the extra seating at a budget.
1 – Calculate the amount of skids you will need, keeping in mind that you will need to double it for the seating area and then calculate what you need to cover the linear feet for your back rest.
– Now you may ask yourself…where can I get some skids? Check your local businesses and job sites. Most managers, owners and jobsite project supervisors are throwing these skids out and would be more than happy to have you take them away instead. It never hurts to ask!
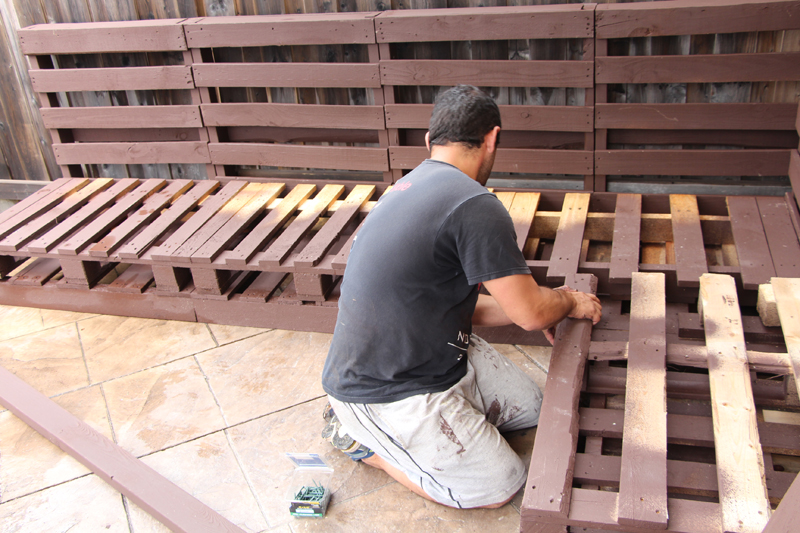
2 – Once you have all your skids, lay them out to see what needs to be modified and adjusted so that the seating area is leveled.
3 – Sand any surfaces needing the extra touch.
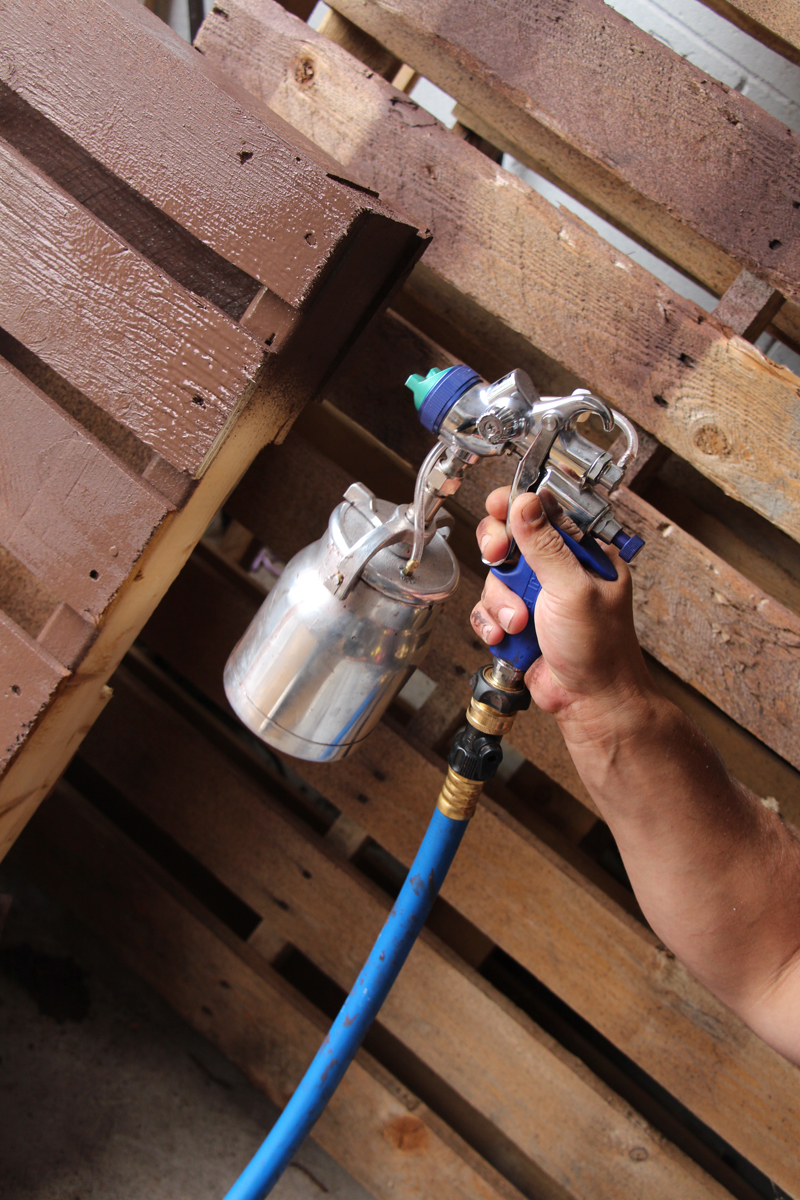
4 – Begin Spraying!
Be sure to check out our July 17th Blog on “Spray Finishing – Tips for Getting Started”
– Remember to prep your area and to thin your paint anywhere from 15-20%
– You may also want to start with a primer before spraying with paint.
– Most importantly before your start spraying familiarize yourself with your equipment – Know what the knobs and adjustments do on your spray gun while you’re practicing on scrap material so that when the time comes, you’ll be able to adjust appropriately and apply a proper coat.
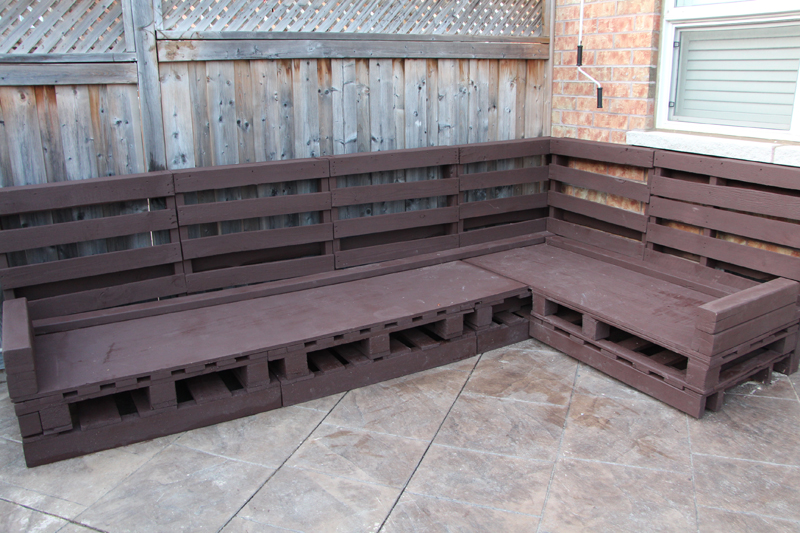
5 – Assemble! Make sure you adjoin the skids to each other and attach the skids being used as back rest to your seating as well…this allows for the entire unit to be one without any shifting when you sit on it.
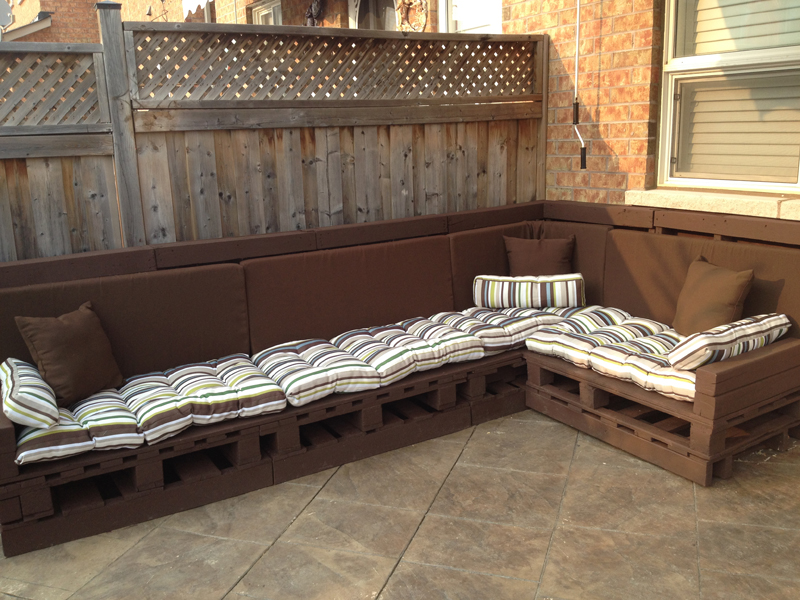
6 – Add either custom made outdoor pillows or purchase outdoor pillows/cushions (like I did) from a store and have them modified to fit the desired area.
Tip: Towards the end of July and within the month of August most outdoor pillow/cushions are on sale. Make sure you adjust your seating measurements to accommodate ready-made outdoor seating cushions.
Adding Your Own Personal Touches
I know all about being on a budget and finding the deals, so this project was perfect for us yet stylish at the same time. I grew up surrounded by carpenters and also developed a creative eye for design therefore we modified the initial idea slightly.
We decided to add plywood on top of the seating area for that extra support and also added 4×4 posts as arm rests. When constructing the arm rests, we made sure to sand the edges and top portions before applying a non-textured wood paint so that it’s nice and smooth to the touch. We also wanted to give it a more finished look and framed the bottom with 2×8 boards.

Cost
Most patio furniture sets can cost a few hundred for a very simple set that may seat 3-4 people to thousands of dollars for an extravagant set. This project cost us roughly $264 for a 10’ by 6’ seating area (seating for 6-8 people).
The skids were of course free and without calculating the cost of the Fuji System we spent $164 on paint and supplies and $100 on store bought cushions (seating cushions, back rest cushions as well as accent pillows with alterations).
First Timers
I’m not a woodworker or a hobbyist and this is my first time ever working with a HVLP sprayer. When you hear that anyone can feel like a pro with this system… it’s the truth.
As first timers, we made a couple phone calls to the very helpful technical department and also watched several videos online, each step taking us closer to a very rewarding ending…Turning something Old to into something Beautiful.
Yes there is a learning curve but with the right system and the right help you can turn trash into treasure over a weekend.
Simple, beautiful, practical for a small or medium size backyard on a budget …It’s that easy!
You can do the same or create your own backyard lounge area with your own finishing touches, and don’t forget to use a Fuji HVLP Spray System… It’s the “Go To” system for those who simply want the best!
I know I wanted the best and got it…You will too! Happy Spraying!